XRP Tank Drive
Overview
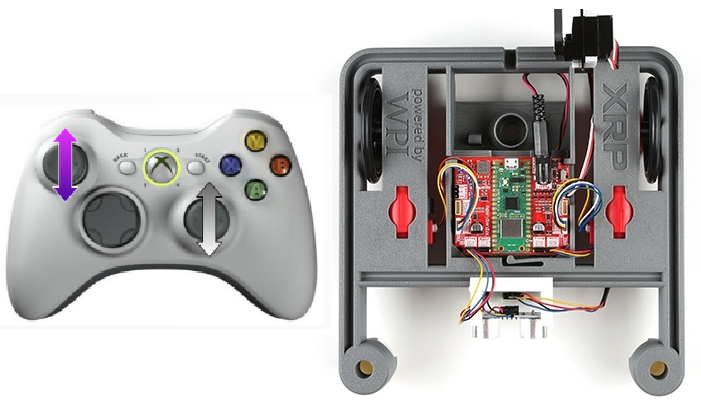
Tank drive is a direct-drive control where one joystick is used for each side of the drive train. The left joystick moves the left motor forward and backward, and the right joystick moves the right motor forward and backward. To turn, you move one joystick forward and the other in reverse. This control scheme offers the driver complete control, but tends to have a steeper learning curve.
But, this scheme is the easiest to implement in software because of its simplicity!
If you have some experience programming, try implementing this drive control now. Otherwise, read on for step-by-step instructions.
The Pre-Code Workout 📊
Before we write any code, it's important to make a flow chart of what we need to do, in human readable tasks. When you are solving any problem in software, it's important to do a step like this either in your head, or on paper.
Let's start with listing out the tasks we need to perform:
- Turn robot left and right
- Drive forward and back
- Read left joystick from controller
- Read right joystick from controller
Flow Chart
A flow chart is a diagram that shows the steps in a process. Each step is represented by a different symbol and contains a short description of the process step. The flow chart symbols are linked together with arrows showing the process flow direction. It's a great way to plan your code before you start writing.
Now that we understand the overall idea of the code, let's create a flowchart to outline what our code needs to do. Programmers use flow charts a lot to visualize a plan for implementing code. Attempt to create your own flowchart before reviewing the provided example.
Flow Chart 📊
Inputs and Outputs
Now that we understand how the code will work, we need to define the input and output of our method.
Inputs: These are things we would like our method to know about.
Outputs: These are what we would like our method to tell everyone else about.
Define Inputs and Outputs. Try defining the Inputs and Outputs before looking.
Inputs:
leftSpeed: The speed value from the left joystick.rightSpeed: The speed value from the right joystick.
Outputs:
Left motor powerRight motor power
While simple, it's important to keep the tasks at hand straight. I will walk you through how to do each of these things in code in the next section.
Time to Start Coding
Clone Repository
Before we start coding, you need to get the robot code on your computer. This is called cloning a repository.
TBD — Java starter repository URL to be added. A Java version of the XRP tutorial project does not exist yet. Once it is created, the clone URL will be added here.
For detailed instructions on how to clone the repository, please follow the guide for cloning a repository.
Once your repository is cloned, return to this tutorial to write your first lines of Java code.
Create a Drivetrain Subsystem
The first step is to create a subsystem for our drivetrain. See How to Create a Subsystem for instructions on how to do this. You should name your subsystem Drivetrain.
The Drivetrain.java File
What is a Class in Java?
Imagine you have a big toolbox, and inside it are all the specialized tools (methods and fields) you need to build something.
In Java, all the code for one part of your robot lives together in a single class file. A class named Drivetrain lives in a file called Drivetrain.java. That one file holds both what the drivetrain can do and how it does it.
At the top of the file you'll see import statements. An import is like telling Java, "Hey, I'm going to use this tool — go find it for me." For more on this, see Packages and Import Statements.
-
We need to tell the software we want to use the XRP robot motors. To do this we will need to import the motor class, see XRP Quick Reference Guide for more details on working with motors.
- We will need to add the following import to the top of the
Drivetrain.javafile, with the other imports:
import edu.wpi.first.wpilibj.xrp.XRPMotor; - We will need to add the following import to the top of the
-
Now we need to tell our code about the two motors on the robot. Think of this like giving a name to each motor so we can command it later. In programming, we call these "objects". We need one for the left motor and one for the right. The robot knows which is which by a channel number. For the XRP, the left motor is channel
0and the right motor is channel1.- Let's add the code to create these motor objects inside our
Drivetrainclass. We'll make themprivate, which means only theDrivetraincode can talk to the motors directly, which helps keep our project organized. We also mark themfinalbecause each motor is created once and never replaced.
// This creates an object for the left motor on channel 0private final XRPMotor m_leftMotor = new XRPMotor(0);// This creates an object for the right motor on channel 1private final XRPMotor m_rightMotor = new XRPMotor(1); - Let's add the code to create these motor objects inside our
-
Finally, we need to create a way to tell the drivetrain how to move. We'll do this by creating a method. A method is just a named set of instructions. We'll name our method
tankDrive. OurtankDrivemethod needs to know how fast each motor should go, so we'll give it two inputs:leftSpeedandrightSpeed. We need to make this methodpublic, which just means that other parts of the robot's code (like the code for the joystick) are allowed to use it.- Add the method to the
Drivetrainclass:
// A method to drive the robot with tank-style controls.// It takes a speed for the left side and a speed for the right side.public void tankDrive(double leftSpeed, double rightSpeed) {// This line tells our left motor object to set its speed to the value of leftSpeed.m_leftMotor.set(leftSpeed);// This line does the same for the right motor, using the rightSpeed value.m_rightMotor.set(rightSpeed);} - Add the method to the
Details
What do all those symbols mean?
Just like English has grammar rules, programming languages do too. We call it 'syntax'. Let's look at the syntax for our method, piece by piece.public void tankDrive(double leftSpeed, double rightSpeed)- Think of this as the method's full name and job description.
publicmeans other parts of the code are allowed to call this method.voidmeans "this method just does something, it doesn't give you anything back." It's like telling someone "Go!" instead of asking "What time is it?".tankDriveis the method's name.- The part in the parentheses
( ... )lists the ingredients the method needs to do its job. In this case, it needs two numbers (which can have decimals, calleddoubles): one namedleftSpeedand one namedrightSpeed.
{ ... }- The curly braces are like the borders of a recipe card. All the instructions for the method go inside them.
m_leftMotor.set(leftSpeed);- This is a single command, like one step in a recipe.
m_leftMotoris the motor we want to talk to.- The
.is like saying "'s" in English. So this is like "the left motor's..." set(leftSpeed)is the command we are giving it. We're telling it to "Set your speed to whatever numberleftSpeedis."- The
;at the end is like a period. It tells the computer that this command is finished.
-
Inverting a Motor. If you were to run the code right now and push both joysticks forward, your robot would probably just spin in a circle.
-
Why does this happen?
- Think about the wheels on a toy car. To make it go forward, the wheels on the right side have to spin the opposite way from the wheels on the left side (one spins clockwise, the other counter-clockwise). Our motors are mounted as mirror images of each other, so telling them both to go "forward" with a positive speed makes them spin the same way, causing the robot to turn.
-
How do we fix it?
- We need to "invert" one of the motors, which just means telling it to do the opposite of what we command. We can do this by simply putting a minus sign
-in front of the speed value for one of the motors.
- We need to "invert" one of the motors, which just means telling it to do the opposite of what we command. We can do this by simply putting a minus sign
-
Let's update our
tankDrivemethod to invert the right motor.public void tankDrive(double leftSpeed, double rightSpeed) {m_leftMotor.set(leftSpeed);// The minus sign here tells the right motor to spin the opposite way.m_rightMotor.set(-rightSpeed);}Now, when you push both joysticks forward, the
rightSpeedwill be made negative, the right motor will spin in the opposite direction of the left motor, and your robot will drive straight!
-
Your Drivetrain.java file should look like this
// Copyright (c) FIRST and other WPILib contributors.
// Open Source Software; you can modify and/or share it under the terms of
// the WPILib BSD license file in the root directory of this project.
package frc.robot.subsystems;
import edu.wpi.first.wpilibj.xrp.XRPMotor;
import edu.wpi.first.wpilibj2.command.SubsystemBase;
public class Drivetrain extends SubsystemBase {
  // This creates an object for the left motor on channel 0
  private final XRPMotor m_leftMotor = new XRPMotor(0);
  // This creates an object for the right motor on channel 1
  private final XRPMotor m_rightMotor = new XRPMotor(1);
public Drivetrain() {}
// A method to drive the robot with tank-style controls.
// It takes a speed for the left side and a speed for the right side.
public void tankDrive(double leftSpeed, double rightSpeed) {
// This line tells our left motor object to set its speed to the value of leftSpeed.
m_leftMotor.set(leftSpeed);
// This line does the same for the right motor, using the rightSpeed value.
m_rightMotor.set(-rightSpeed);
}
// This method will be called once per scheduler run
@Override
public void periodic() {}
}
The RobotContainer.java File
What is the Robot Container?
Imagine your robot is a person. We've already built the Drivetrain, which is like the robot's legs. We also have a joystick, which is like the robot's ears for hearing commands.
The RobotContainer is like the robot's brain. It's the central place where everything gets connected. The brain's job is to:
- Know about all the parts: It holds onto our
Drivetrainsubsystem and our joystick. - Connect them: It listens to the joystick (the ears) and tells the
Drivetrain(the legs) what to do.
Now let's add our parts to the brain.
-
First, we need to tell our
RobotContainer(the brain) where to find the blueprints for ourDrivetrain, ourCommandXboxController, and theRunCommandwe'll use to connect them. We do this by addingimportstatements at the top ofRobotContainer.java. For more details on the controller, see the Xbox Controller quick reference.import edu.wpi.first.wpilibj2.command.RunCommand;import edu.wpi.first.wpilibj2.command.button.CommandXboxController;import frc.robot.subsystems.Drivetrain; -
Next, we need to create the actual
DrivetrainandCommandXboxControllerobjects inside ourRobotContainer. Think of this as giving the brain its own set of legs and ears to use. We'll declare these asprivate finalfields to keep our code organized.// Create an instance of our Drivetrain subsystemprivate final Drivetrain m_drivetrain = new Drivetrain();// Create an instance of the Xbox Controller on USB port 0private final CommandXboxController m_driverController = new CommandXboxController(0); -
Setting the Drivetrain's Default Job
We need to tell the
Drivetrainwhat it should be doing by default: listening to our joysticks. We do this by setting its "Default Command". This command will run automatically whenever no other special commands are using the drivetrain.In
RobotContainer.java, find theconfigureBindings()method. This is where we'll add the code to link the controller to ourtankDrivemethod.// Set the default command for the drivetrain.// This will run whenever no other command is running on the drivetrain.m_drivetrain.setDefaultCommand(new RunCommand(() -> m_drivetrain.tankDrive(-m_driverController.getLeftY(),-m_driverController.getRightY()),m_drivetrain));What does this code do?
- It tells the
m_drivetrainto run a command by default. - The command continuously gets the Y-axis value from the left and right joysticks.
- It sends those values to our
tankDrivemethod. We use a minus sign (-) because the joystick's Y-axis is inverted (pushing forward gives a negative number).
- It tells the
Let's break down that code syntax
Let's look at that block of code line-by-line. Think of it like giving a set of instructions to a robot chef.
m_drivetrain.setDefaultCommand(...);
- This says: "Hey Drivetrain, I'm about to give you your default job."
m_drivetrainis our robot's drivetrain.- The
.is like saying "'s". setDefaultCommandis the instruction we are giving it. The job we put inside the()is what it will do whenever it has nothing else to do.
new RunCommand( ... )
- This says: "The job is a 'Run Command', which means you'll do it over and over, very fast."
- This is a special type of command from the WPILib toolbox that's perfect for things that need constant updates, like reading a joystick.
() -> m_drivetrain.tankDrive( ... )
- This is a sticky note with instructions. The
() -> ...is a small, nameless function called a lambda. It's the list of steps to do every loop.
m_drivetrain.tankDrive(
-m_driverController.getLeftY(),
-m_driverController.getRightY()
)
- This is the main instruction on the sticky note.
m_drivetrain.tankDrive(...)tells the drivetrain to use thetankDrivemethod we wrote earlier.-m_driverController.getLeftY()gets the position of the left joystick (up/down). We use a minus sign-because pushing the joystick up gives a negative number, and we need to flip it to be positive for "forward".-m_driverController.getRightY()does the exact same thing for the right joystick.
m_drivetrain
- This says: "By the way, this job requires the drivetrain."
- This is a note for the robot's main scheduler. It makes sure that no two commands try to use the drivetrain at the exact same time, which would cause chaos.
Your RobotContainer.java file should look like this
// Copyright (c) FIRST and other WPILib contributors.
// Open Source Software; you can modify and/or share it under the terms of
// the WPILib BSD license file in the root directory of this project.
package frc.robot;
import edu.wpi.first.wpilibj2.command.Command;
import edu.wpi.first.wpilibj2.command.RunCommand;
import edu.wpi.first.wpilibj2.command.button.CommandXboxController;
import frc.robot.subsystems.Drivetrain;
/**
* This class is where the bulk of the robot should be declared. Since
* Command-based is a "declarative" paradigm, very little robot logic should
* actually be handled in the {@link Robot} periodic methods (other than the
* scheduler calls). Instead, the structure of the robot (including subsystems,
* commands, and trigger mappings) should be declared here.
*/
public class RobotContainer {
  // Create an instance of our Drivetrain subsystem
  private final Drivetrain m_drivetrain = new Drivetrain();

  // Create an instance of the Xbox Controller on USB port 0
  private final CommandXboxController m_driverController = new CommandXboxController(0);
public RobotContainer() {
configureBindings();
}
private void configureBindings() {
  // Set the default command for the drivetrain.
  // This will run whenever no other command is running on the drivetrain.
  m_drivetrain.setDefaultCommand(new RunCommand(
      () -> m_drivetrain.tankDrive(
          -m_driverController.getLeftY(),
          -m_driverController.getRightY()),
      m_drivetrain));
}
public Command getAutonomousCommand() {
return null;
}
}
Time to test your code
Need help connecting to the XRP robot? See: Connecting to the XRP Robot
Great job writing your first XRP code. it is time to test your code. Go to XRP Run Code to test your code.
If everything is working correctly, you can now drive your XRP robot using the left and right joysticks.
Challenge: Level Up Your Tank Drive 🚀
Ready to go beyond the basics? Try one (or many) of these mini‑challenges to improve control, readability, and driver experience.
- Add a constant speed or turning scale (ex: 60% power) so the robot is easier to control
- Add a small deadband (ignore tiny joystick values like ±0.1) so the robot doesn't creep.
- Print the left and right joystick values to the console for debugging.
Tips
- Make only one change at a time—test after each.
- Keep your code tidy this will help you better understand your code
When you've completed a challenge, describe what you improved and why. That thinking habit is how you become a great controls programmer. 🔧